
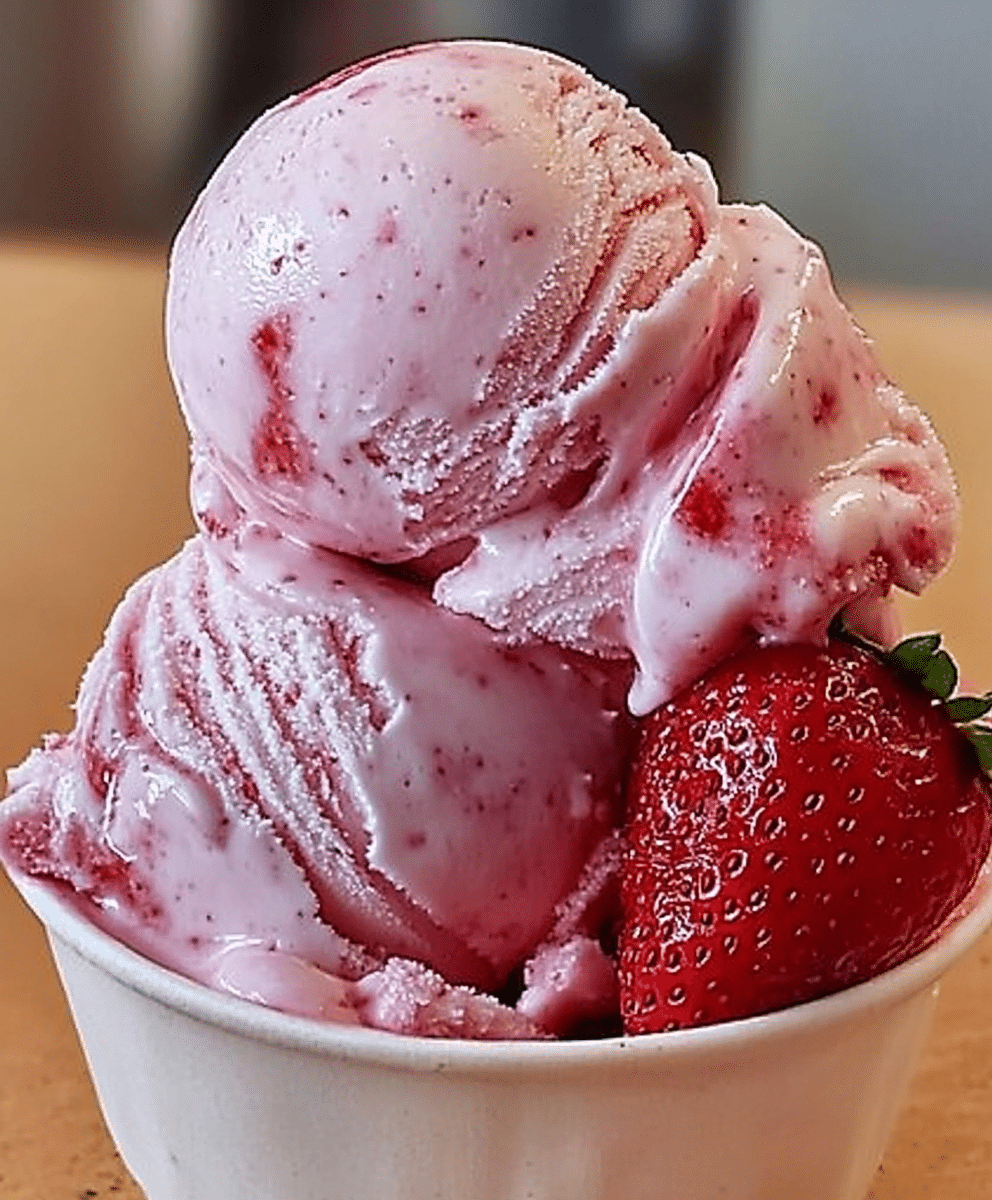
There's nothing quite like the sweet, creamy taste of homemade strawberry vanilla bean ice cream on a warm summer day. The combination of fresh, juicy strawberries and rich vanilla bean creates an irresistible treat that's far better than anything store-bought.

I first started making this recipe when I stumbled upon an abundance of ripe strawberries at the farmer's market. Their natural sweetness and deep red color inspired me to create an ice cream that would highlight their flavor while incorporating the luxurious depth of real vanilla bean. Since then, this has become my go-to dessert for family gatherings and special occasions.
Why You'll Love This Homemade Strawberry Vanilla Bean Ice Cream
Get ready to fall in love with the perfect balance of fruitiness and creamy decadence. This homemade ice cream is everything you crave in a summer treat.
First off, it's bursting with fresh strawberry flavor. Unlike artificial strawberry ice creams, this version uses real strawberries, ensuring an authentic taste with every bite.
The addition of real vanilla bean makes all the difference. The specks of vanilla throughout the ice cream add both visual appeal and a depth of flavor you simply can't get from extract alone.
This recipe is also surprisingly easy to make. With just a handful of ingredients and a little patience, you’ll have a homemade ice cream that rivals any gourmet shop.
Best of all, it's free from unnecessary preservatives and artificial flavors. You know exactly what’s going into your dessert, making it a treat you can feel good about sharing.
Ingredients Notes

The magic of this homemade ice cream comes from its high-quality, simple ingredients. Each one plays a crucial role in creating the perfect texture and taste.
Fresh strawberries are the star of the show. Look for ripe, in-season berries for the best natural sweetness and deep color. If fresh strawberries aren’t available, you can use frozen ones—just be sure to thaw and drain them well before using.
Vanilla bean takes this ice cream to the next level. The tiny black seeds from the pod infuse the mixture with an intense vanilla flavor that extract just can't match. If you don’t have a vanilla bean, you can substitute it with high-quality vanilla bean paste or pure vanilla extract, but the flavor won’t be quite as rich.
Heavy cream and whole milk provide the luscious, creamy texture. The combination of the two creates the ideal balance—rich but not overly heavy. Avoid using low-fat milk, as it won’t produce the same velvety consistency.
Egg yolks add richness and help create a smooth, custard-like base. They also prevent ice crystals from forming, ensuring a perfectly creamy scoop every time.
A touch of sugar enhances the natural sweetness of the strawberries without overpowering them. You can adjust the amount depending on how sweet your berries are.
How To Make This Homemade Strawberry Vanilla Bean Ice Cream
Making homemade ice cream might seem intimidating, but this recipe breaks it down into simple steps that guarantee success.
Start by preparing the strawberries. Hull and chop them, then toss them with a bit of sugar to help release their natural juices. Let them sit for about 30 minutes before blending them into a smooth puree. This step intensifies the strawberry flavor and ensures even distribution throughout the ice cream.
Next, prepare the custard base. In a saucepan, heat the heavy cream, whole milk, and vanilla bean seeds (along with the scraped pod) over medium heat until warm but not boiling. This allows the vanilla to infuse into the dairy for maximum flavor.
While the cream mixture is heating, whisk the egg yolks and sugar in a separate bowl until they become pale and slightly thickened. Slowly temper the eggs by adding a small amount of the warm cream mixture while whisking constantly. Then, gradually combine everything back into the saucepan and cook until the mixture thickens slightly. Be careful not to overheat, as this can scramble the eggs.
Strain the custard through a fine-mesh sieve to remove any lumps and the vanilla pod. Let it cool to room temperature before stirring in the strawberry puree. For the best flavor, refrigerate the mixture for at least 4 hours, or overnight, to allow the flavors to meld.
Once chilled, churn the mixture in an ice cream maker according to the manufacturer’s instructions. After about 20-25 minutes, the ice cream should reach a soft-serve consistency. Transfer it to an airtight container and freeze for an additional 2-3 hours to firm up before serving.
Storage Options
Homemade ice cream is best enjoyed fresh, but it can be stored in the freezer for up to two weeks. Use an airtight container to prevent ice crystals from forming and maintain the creamy texture.
For even better preservation, press a piece of plastic wrap directly onto the surface of the ice cream before sealing the container. This minimizes air exposure and helps prevent freezer burn.
If your ice cream becomes too hard after freezing, let it sit at room temperature for 5-10 minutes before scooping. This will soften it just enough to make serving easier.
Variations and Substitutions
One of the best things about homemade ice cream is how easy it is to customize! Here are a few ways to switch up this recipe to suit your tastes.
For a dairy-free version, substitute the heavy cream and milk with full-fat coconut milk. The result will be a slightly different flavor profile, but still incredibly creamy and delicious.
Want a strawberries and cream twist? Swirl in a few extra spoonfuls of lightly mashed strawberries right before freezing for added texture and bursts of fruity goodness.
To make a vegan version, replace the egg yolks with a cornstarch-based thickener. Mix 2 tablespoons of cornstarch with a bit of the coconut milk before adding it to the heated mixture. This will help mimic the custard-like consistency without eggs.
If you love a little crunch, try adding crushed shortbread cookies or graham cracker crumbs during the last few minutes of churning. This will give your ice cream a delightful texture similar to a strawberry cheesecake flavor.
No matter how you choose to make it, this homemade strawberry vanilla bean ice cream is a must-try. Once you taste the pure, rich flavors, you’ll never want store-bought again!
PrintHomemade Strawberry Vanilla Bean Ice Cream Recipe

This homemade strawberry vanilla bean ice cream is rich, creamy, and bursting with fresh strawberry flavor. Made with real vanilla bean and high-quality ingredients, this easy recipe delivers a luscious texture and a perfect balance of sweetness. Ideal for summer desserts or anytime you crave a classic homemade treat!
- Prep Time: 20 minutes
- Cook Time: 10 minutes
- Total Time: 4 hours 30 minutes (including chilling & freezing)
- Yield: 6 servings
- Category: Dessert
- Method: Churning
- Cuisine: American
- Diet: Vegetarian
Ingredients
- 2 cups heavy cream
- 1 cup whole milk
- ¾ cup granulated sugar
- 1 vanilla bean (seeds scraped) or 2 teaspoon vanilla extract
- 1 ½ cups fresh strawberries, hulled and mashed
- 4 large egg yolks
Instructions
- In a saucepan, heat the heavy cream, milk, sugar, and vanilla bean seeds over medium heat until warm (do not boil).
- In a separate bowl, whisk the egg yolks. Slowly add a small amount of the warm cream mixture to temper the yolks, whisking constantly.
- Gradually pour the tempered yolks back into the saucepan, stirring continuously until the mixture thickens slightly (about 5 minutes).
- Remove from heat and strain through a sieve to remove any solids. Let cool completely.
- Once cooled, mix in the mashed strawberries.
- Chill the mixture in the refrigerator for at least 4 hours or overnight.
- Churn in an ice cream maker according to the manufacturer’s instructions.
- Transfer to a container and freeze for at least 2 hours before serving.
Notes
- Use ripe, sweet strawberries for the best flavor.
- If you don’t have an ice cream maker, freeze the mixture in a shallow dish, stirring every 30 minutes until creamy.
- For extra richness, use only heavy cream instead of milk.
Nutrition
- Serving Size: ½ cup
- Calories: 280
- Sugar: 24g
- Sodium: 40mg

Leave a Reply