
No-bake cheesecake jars are a quick and delightful dessert that doesn't require you to fire up the oven. Perfect for hot summer days or whenever you're short on time, these individual-sized treats offer all the creamy richness of traditional cheesecake without the fuss. Whether you're planning a dinner party, an outdoor picnic, or just want a simple dessert for your family, this no-bake cheesecake jar recipe is sure to impress. Read on for everything you need to know to create these mouth-watering treats in your kitchen, plus some handy tips, variations, and presentation ideas to take your dessert game to the next level!

What are No-Bake Cheesecake Jars?
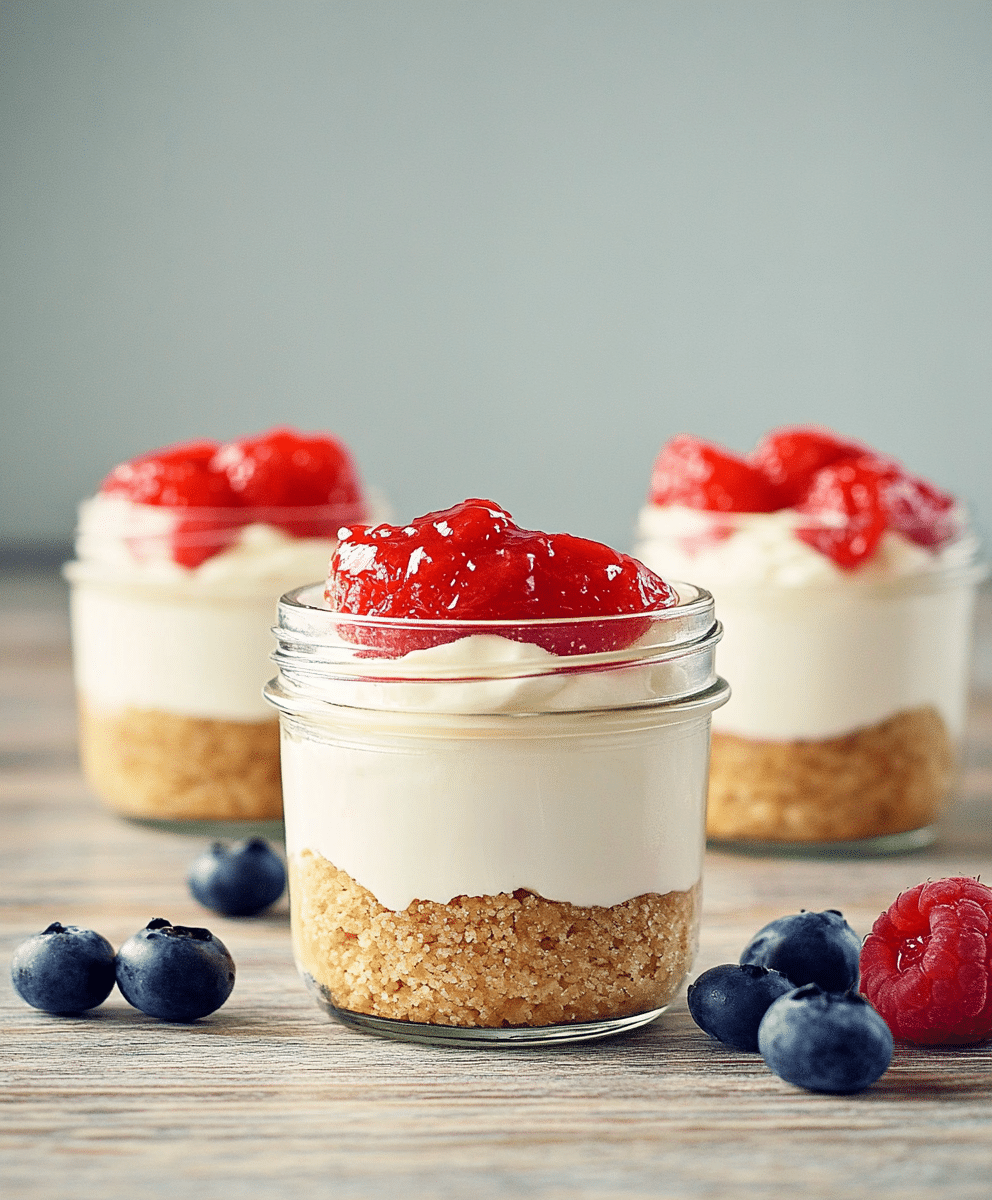
No-bake cheesecake jars are a deconstructed version of a classic cheesecake, assembled in small jars or cups for individual servings. Instead of baking the cheesecake in a traditional pan, you layer a creamy cheesecake filling with a buttery graham cracker crust and often a fruit or chocolate topping. The key is the absence of any need for baking—the crust is simply refrigerated to set, while the cheesecake filling gets its fluffy, stable texture from cream cheese, whipped cream, or gelatin, depending on the recipe.
These jars are perfect for making in advance, and because they are served individually, they make an elegant yet easy-to-eat dessert for parties and gatherings. Plus, the jars offer a fun, rustic presentation that looks charming on any dessert table.
Ingredients List for No-Bake Cheesecake Jars
To make these no-bake cheesecake jars, you'll need a variety of ingredients that come together for the perfect combination of textures and flavors. Here's a breakdown:
For the Crust:
- 1 ½ cups graham cracker crumbs (about 10-12 full sheets)
- ¼ cup granulated sugar
- ½ cup unsalted butter, melted
For the Cheesecake Filling:
- 16 oz cream cheese, softened
- 1 cup powdered sugar
- 1 teaspoon vanilla extract
- 1 tablespoon lemon juice (optional, for added tang)
- 1 ½ cups heavy cream, whipped to soft peaks
For the Toppings:
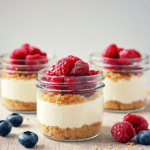
- Fresh berries (strawberries, blueberries, raspberries, etc.)
- Fruit preserves or compote
- Chocolate ganache
- Crushed nuts or chocolate chips (optional)
Substitutions and Variations
The beauty of no-bake cheesecake jars is their versatility. You can customize the recipe to suit your tastes or dietary preferences. Here are a few ideas for substitutions and variations:
- Crust Alternatives: If you're not a fan of graham crackers, try using crushed Oreos, digestive biscuits, or even gingersnaps. For a gluten-free option, look for gluten-free graham crackers or cookies.
- Dairy-Free or Vegan Option: Substitute the cream cheese with a dairy-free alternative such as cashew cream cheese or a store-bought vegan cream cheese. Use coconut cream or a dairy-free whipped topping in place of heavy cream.
- Sweeteners: If you prefer, swap the granulated and powdered sugars with alternatives like coconut sugar, honey, or maple syrup for a different flavor profile. If you're looking for a low-sugar version, a sugar-free sweetener like stevia or monk fruit can be used instead.
- Toppings: Feel free to mix and match your toppings! Use caramel sauce, crushed cookies, nuts, or even flavored syrups. You can also top your cheesecake jars with seasonal fruits for a fresh twist.
Step-by-Step Cooking Instructions
Making no-bake cheesecake jars is surprisingly simple, with minimal effort and no baking time involved. Here’s a step-by-step guide to ensure your dessert comes out perfectly every time.
Step 1: Prepare the Crust
- In a medium bowl, combine the graham cracker crumbs and granulated sugar.
- Stir in the melted butter until the crumbs are evenly coated and the mixture holds together when pressed between your fingers.
- Spoon about 2 tablespoons of the crust mixture into each serving jar (you’ll need about 8-10 small jars or cups). Press the mixture down firmly using the back of a spoon or the bottom of a glass to create a compact crust. Set the jars aside while you prepare the filling.
Step 2: Make the Cheesecake Filling
- In a large bowl, beat the softened cream cheese with a hand mixer or stand mixer until smooth and creamy, about 2-3 minutes.
- Add the powdered sugar, vanilla extract, and lemon juice (if using). Beat until well combined and no lumps remain.
- In a separate bowl, whip the heavy cream until soft peaks form. Be careful not to overwhip, as you want the cream to be fluffy, not stiff.
- Gently fold the whipped cream into the cream cheese mixture until everything is smooth and well-incorporated.
Step 3: Assemble the Cheesecake Jars
- Spoon or pipe the cheesecake filling into the jars on top of the graham cracker crust. Fill the jars to about three-quarters full, leaving some space for toppings.
- Smooth the tops with a spatula, or tap the jars gently on the counter to settle the filling evenly.
Step 4: Add Toppings
- Now for the fun part—add your chosen toppings! Spoon fresh berries, fruit preserves, or chocolate ganache over the cheesecake filling. You can also sprinkle crushed nuts, cookie crumbles, or a drizzle of caramel sauce for extra flavor and texture.
- Once the jars are topped, cover them with lids or plastic wrap and refrigerate for at least 3-4 hours to allow the filling to set.
How to Cook No-Bake Cheesecake Jars: A Step-by-Step Guide
While there’s no cooking involved in this no-bake dessert, the assembly process is crucial to get the right texture and flavor balance. Here's a recap of the key steps:
- Prepare the Crust: Combine graham cracker crumbs, sugar, and melted butter; press into jars.
- Make the Filling: Beat cream cheese until smooth, then fold in whipped cream for a fluffy texture.
- Assemble the Jars: Layer the filling over the crust and top with fruit, chocolate, or other garnishes.
- Chill: Refrigerate for several hours to let the cheesecake set and the flavors meld.
Common Mistakes to Avoid
While no-bake cheesecake jars are a simple dessert, a few common mistakes can affect the final result. Avoid these pitfalls for the perfect cheesecake every time:
- Not softening the cream cheese: If your cream cheese isn’t fully softened, you’ll end up with lumpy filling. Let it sit at room temperature for at least 30 minutes before starting.
- Over-whipping the cream: Be careful when whipping the heavy cream. If you over-whip, it can turn into butter or become grainy, affecting the texture of your filling.
- Skipping the chilling step: The cheesecake jars need to chill for at least 3-4 hours, preferably overnight. Skipping this step will result in a runny filling that doesn’t set properly.
Serving and Presentation Tips
One of the best things about no-bake cheesecake jars is how beautiful they look when served individually. Here are some presentation ideas and serving tips to elevate this simple dessert.
How to Serve No-Bake Cheesecake Jars
- Serve your no-bake cheesecake jars chilled. These desserts taste best when cold and fully set.
- For a fun and festive touch, offer a variety of toppings in bowls so guests can personalize their cheesecake jars. This works especially well for parties or gatherings.
- You can also serve the jars with small dessert spoons, making them the perfect grab-and-go dessert for picnics or outdoor events.
Presentation Ideas for No-Bake Cheesecake Jars
- Rustic Charm: Serve the cheesecakes in small mason jars or vintage glass containers. Tie a ribbon or twine around the jars for a charming, rustic presentation.
- Layered Look: For a more dramatic presentation, layer the crust, cheesecake filling, and toppings in multiple layers. Alternating the colors of the fruit and cream will create a visually appealing dessert.
- Garnishes: Top each jar with a sprig of mint, a dusting of powdered sugar, or even edible flowers for a beautiful finishing touch.
No-Bake Cheesecake Jars Recipe Tips
- Make Ahead: These cheesecake jars are ideal for making in advance. You can prepare them the day before and refrigerate them until ready to serve. Just add the fresh toppings right before serving to keep them looking their best.
- Jars or Cups?: If you don’t have mason jars, no problem! Small dessert glasses, cups, or even wine glasses can be used to create an elegant presentation.
- Piping the Filling: For a neater look, transfer the cheesecake filling into a piping bag and pipe it into the jars. This ensures clean, even layers without any mess.
Frequently Asked Questions (FAQs)
Q: Can I make these no-bake cheesecake jars ahead of time?
A: Absolutely! You can prepare them up to 2 days in advance. Just store them in the refrigerator until ready to serve.
Q: Can I freeze the cheesecake jars?
A: Yes, you can freeze them, but it’s best to freeze them without the toppings. Just thaw in the fridge for several hours before serving.
Q: How long do no-bake cheesecake jars last in the fridge?
A: These cheesecake jars can be stored in the refrigerator for up to 4-5 days. Be sure to keep them covered to maintain freshness.
Conclusion
No-bake cheesecake jars are a versatile, crowd-pleasing dessert that anyone can make. With a creamy filling, a crunchy crust, and endless topping possibilities, these individual treats are perfect for any occasion. The no-bake aspect means less time in the kitchen and more time enjoying your sweet creation with family and friends. Try this recipe today, experiment with flavors, and wow your guests with this delightful, easy-to-make dessert!
PrintNo-Bake Cheesecake Jars Recipe
Indulge in these delicious No-Bake Cheesecake Jars, perfect for a simple dessert without the hassle of baking. This recipe combines a buttery graham cracker crust, a rich and creamy cheesecake filling, and your choice of toppings like fresh fruit or chocolate. Ideal for portioned servings, these jars are great for parties or a quick treat at home.
- Prep Time: 15 minutes
- Cook Time: None
- Total Time: 2 hours 15 minutes (including chilling)
- Yield: 6 jars
- Category: Dessert
- Method: Baking
- Cuisine: American
- Diet: Vegetarian
Ingredients
- Graham crackers
- Cream cheese
- Sugar
- Vanilla extract
- Heavy cream
- Butter (melted)
- Fresh fruit or toppings of choice (optional)
Instructions
- Crush the graham crackers and mix with melted butter. Press the mixture into the bottoms of jars.
- In a separate bowl, beat cream cheese, sugar, and vanilla until smooth. Gradually fold in whipped cream.
- Spoon the cheesecake mixture over the graham cracker crust in the jars.
- Chill the jars in the refrigerator for at least 2 hours before serving. Add toppings if desired.
Notes
- These cheesecake jars can be made ahead and refrigerated for up to 3 days.
- For extra flavor, mix in lemon zest or swap in chocolate cookies for the crust.
Nutrition
- Serving Size: 1 jar
- Calories: 350 kcal
- Sugar: 24g
- Sodium: 250mg

Leave a Reply