
If you're a fan of rich, creamy cheesecakes and crave the crunch of Butterfinger candy bars, then you're in for a treat! This Peanut Butter Butterfinger Cheesecake recipe is a perfect combination of decadent flavors and textures that will leave your taste buds begging for more. Whether you're making it for a special occasion or just because you deserve a sweet treat, this cheesecake is guaranteed to be a hit. Ready to dive into a delicious dessert? Read on for the full recipe, from ingredients to expert tips!

What is Peanut Butter Butterfinger Cheesecake?
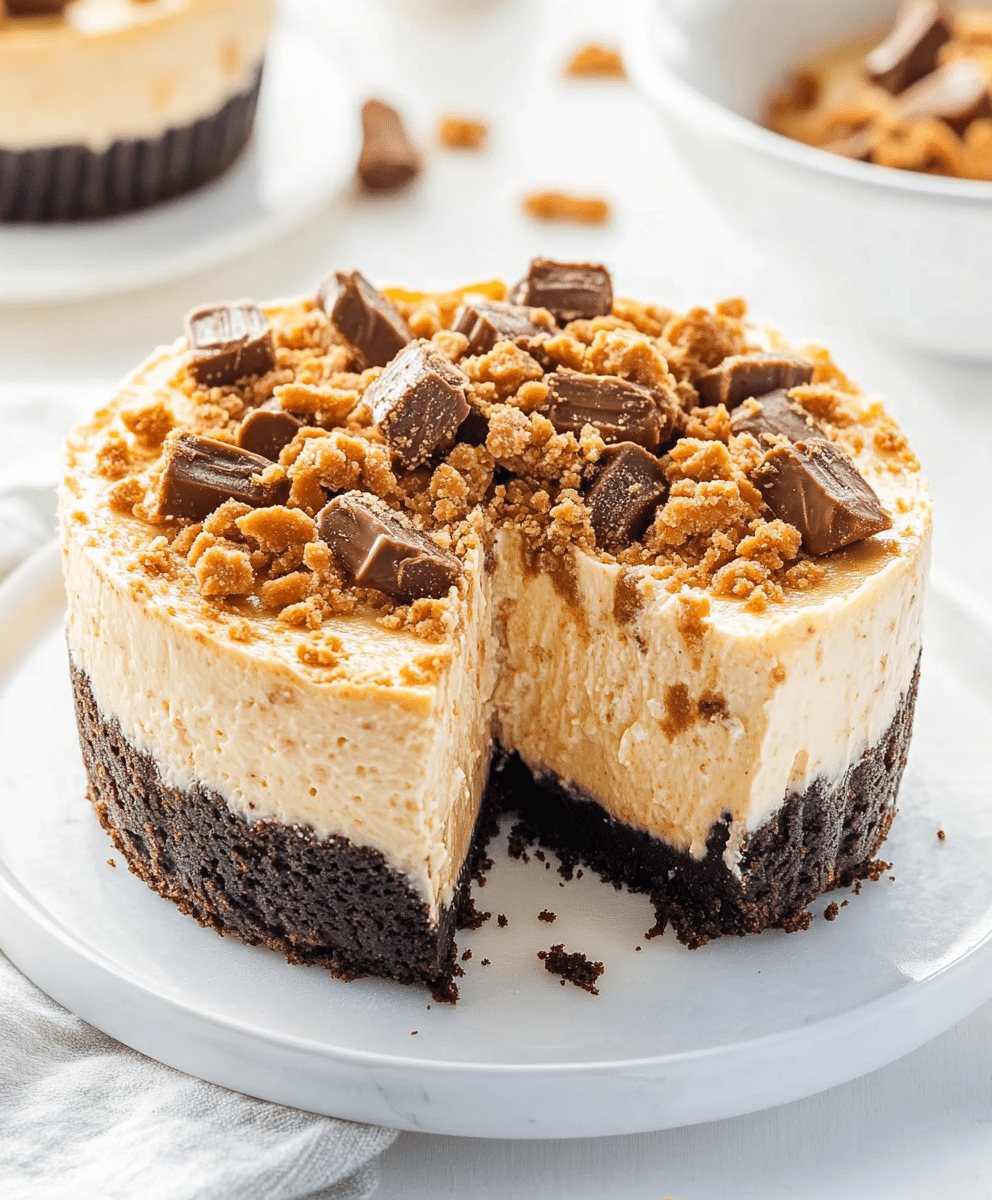
Peanut Butter Butterfinger Cheesecake is a luscious, creamy dessert made with a peanut butter-infused cheesecake filling, a buttery graham cracker crust, and crunchy bits of Butterfinger candy scattered throughout. The combination of smooth, velvety cheesecake with the irresistible crunch of Butterfinger creates a dessert that’s indulgent and unforgettable. This dessert offers the perfect balance of salty peanut butter and sweet candy bar goodness.
Ingredients List for Peanut Butter Butterfinger Cheesecake
For the Crust:
- 2 cups graham cracker crumbs (about 16 graham crackers)
- ¼ cup granulated sugar
- ½ cup unsalted butter, melted
For the Peanut Butter Cheesecake Filling:
- 3 (8 oz) packages cream cheese, softened
- 1 cup creamy peanut butter
- 1 cup granulated sugar
- ½ cup sour cream
- 3 large eggs
- 1 teaspoon vanilla extract
- 1 ½ cups chopped Butterfinger candy bars
For the Butterfinger Topping:
- 1 cup heavy cream
- ¼ cup powdered sugar
- 1 teaspoon vanilla extract
- 1 cup chopped Butterfinger candy bars (for topping)
Substitutions and Variations
Here are some substitutions and variations to consider for your Peanut Butter Butterfinger Cheesecake recipe:
- Crust Substitution: If you’re not a fan of graham crackers, you can substitute them with crushed Oreos or digestive biscuits for a different flavor profile.
- Butterfinger Alternative: If you can't find Butterfinger bars, substitute with other crunchy candy bars like Heath bars, Snickers, or Reese’s Pieces for a unique twist.
- Peanut Butter: Use natural peanut butter or almond butter if you prefer a healthier or slightly different nutty taste.
- Gluten-Free Option: For a gluten-free version, use gluten-free graham crackers or cookies for the crust, and ensure that your candy bars are also gluten-free.
Step-by-Step Cooking Instructions
Now that we have all the ingredients sorted, let's get into the nitty-gritty of how to prepare this mouthwatering Peanut Butter Butterfinger Cheesecake!
- Preheat Your Oven: Begin by preheating your oven to 350°F (175°C). This ensures your cheesecake will bake evenly.
- Prepare the Crust: In a medium-sized bowl, combine the graham cracker crumbs, sugar, and melted butter. Stir until the mixture resembles wet sand. Press the mixture evenly into the bottom of a 9-inch springform pan. Use the back of a spoon or your fingers to ensure the crust is compact. Bake for 10 minutes, then set aside to cool while you prepare the filling.
- Make the Peanut Butter Cheesecake Filling: In a large mixing bowl, beat the softened cream cheese until smooth and creamy. Add in the peanut butter and sugar, beating until fully incorporated. Next, add the sour cream and vanilla extract, mixing well. Finally, add the eggs one at a time, beating on low speed to avoid incorporating too much air. Gently fold in the chopped Butterfinger candy bars.
- Pour the Filling: Pour the cheesecake filling onto the prepared crust, spreading it out evenly with a spatula.
- Bake the Cheesecake: Place the springform pan on a baking sheet and bake for 50–60 minutes, or until the center is just slightly jiggly. The edges should be set. If the top starts to brown too quickly, cover it loosely with aluminum foil to prevent over-browning.
- Cool the Cheesecake: Turn off the oven and let the cheesecake cool inside with the oven door slightly ajar for about 1 hour. This gradual cooling process helps prevent cracks in the cheesecake.
- Chill in the Fridge: Once the cheesecake has cooled to room temperature, transfer it to the refrigerator to chill for at least 4 hours, or overnight for the best texture and flavor.
How to Cook Peanut Butter Butterfinger Cheesecake: A Step-by-Step Guide
Cooking the perfect Peanut Butter Butterfinger Cheesecake is all about following the right steps to ensure that each component comes together seamlessly.
- Mixing the Ingredients: When preparing the cheesecake filling, be sure to thoroughly beat the cream cheese and peanut butter to avoid lumps. This ensures a smooth and creamy texture.
- Even Baking: Bake your cheesecake in a water bath (bain-marie) if you want to ensure an even bake and prevent cracks. Simply wrap the springform pan with foil and place it in a roasting pan filled with an inch of hot water.
- Slow Cooling: Sudden changes in temperature can cause cracks. Always let your cheesecake cool in the oven with the door slightly open before transferring it to the fridge.
Common Mistakes to Avoid
Even seasoned bakers can make a few errors when baking cheesecake. Here’s what to avoid:
- Over-mixing the Batter: Be careful not to overbeat the eggs into the cheesecake filling. This can cause the cheesecake to puff up too much and crack when it cools.
- Skipping the Water Bath: Cheesecakes are prone to cracking due to uneven baking. A water bath helps regulate the temperature and prevent this.
- Rushing the Cooling Process: Cheesecake needs ample time to cool down gradually. Rushing this step will lead to cracks and a less than perfect texture.
Serving and Presentation Tips
Once your Peanut Butter Butterfinger Cheesecake is fully chilled and ready to serve, you can add some flair to your presentation. Whether you're serving it for a special event or just as a weekend dessert, these tips will elevate your cheesecake's presentation.
- Add Whipped Cream: Using a piping bag, swirl fresh whipped cream around the edge of the cheesecake for a professional look. You can use star-shaped piping tips for extra flair.
- Top with Butterfinger Pieces: Sprinkle chopped Butterfinger bars over the top of the cheesecake just before serving for added crunch and visual appeal.
- Drizzle with Chocolate or Caramel Sauce: A light drizzle of warm caramel or chocolate sauce adds a decadent touch to each slice. This works well with the peanut butter and candy bar flavors.
How to Serve Peanut Butter Butterfinger Cheesecake
To serve your Peanut Butter Butterfinger Cheesecake in the best way possible:
- Use a Clean Knife: Slice the cheesecake using a sharp knife dipped in hot water. Wipe the knife clean between cuts to ensure neat slices.
- Serve Chilled: This cheesecake is best served cold, straight out of the fridge. The cold temperature will help the peanut butter and Butterfinger flavors shine.
Presentation Ideas for Peanut Butter Butterfinger Cheesecake
Consider these presentation ideas to take your cheesecake to the next level:
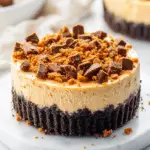
- Individual Servings: Instead of baking one large cheesecake, use mini springform pans or cupcake tins to create individual-sized cheesecakes. This makes serving easier and adds a fun twist.
- Layered Topping: Create a layered effect by adding crushed Butterfinger pieces between layers of whipped cream on top. It gives the cheesecake a beautiful, textured look.
Peanut Butter Butterfinger Cheesecake Recipe Tips
Here are some expert tips to make your cheesecake the best it can be:
- Room Temperature Ingredients: Make sure all your dairy ingredients are at room temperature before mixing. This helps everything blend smoothly and prevents lumps.
- Don’t Overbake: Remember, a cheesecake continues to cook as it cools. Look for a slight jiggle in the center to know when it’s done.
- Refrigerate Overnight: For the best flavor and texture, let the cheesecake chill overnight in the fridge. This allows the flavors to meld and the texture to firm up.
Frequently Asked Questions (FAQs)
Q: Can I make this cheesecake ahead of time?
A: Absolutely! In fact, this cheesecake tastes even better the day after it’s made, so making it ahead is highly recommended.
Q: Can I freeze Peanut Butter Butterfinger Cheesecake?
A: Yes, you can freeze it. Wrap it tightly in plastic wrap and aluminum foil before freezing. To serve, thaw overnight in the fridge.
Q: How long will the cheesecake last in the fridge?
A: It will last for up to 5 days when stored properly in an airtight container in the fridge.
Conclusion
Peanut Butter Butterfinger Cheesecake is a crowd-pleasing dessert that combines the smooth, rich taste of peanut butter with the crunchy, sweet goodness of Butterfinger candy bars. Whether you're making it for a party, a holiday gathering, or simply as a treat for yourself, this cheesecake is sure to impress. Now that you’ve got the recipe, tips, and techniques, it’s time to gather your ingredients and get baking! Trust us, one bite of this dessert and you’ll be hooked.
PrintPeanut Butter Butterfinger Cheesecake Recipe
This Peanut Butter Butterfinger Cheesecake recipe is a deliciously rich and creamy dessert made with a peanut butter filling and crunchy Butterfinger topping. The combination of peanut butter and Butterfinger creates a decadent, sweet, and salty treat that’s perfect for cheesecake lovers.
- Prep Time: 25 minutes
- Cook Time: 55 minutes
- Total Time: 5 hours (including chilling time)
- Yield: 12 servings
- Category: Dessert
- Method: Baking
- Cuisine: American
- Diet: Vegetarian
Ingredients
- Crushed graham crackers
- Melted butter
- Cream cheese
- Peanut butter
- Sugar
- Eggs
- Vanilla extract
- Butterfinger candy bars, chopped
- Heavy cream
Instructions
- Preheat the oven to 350°F (175°C).
- Mix graham cracker crumbs with melted butter, press into a springform pan to form the crust.
- Beat cream cheese, peanut butter, and sugar until smooth.
- Add eggs and vanilla extract, mixing until incorporated.
- Fold in chopped Butterfinger pieces.
- Pour mixture onto the crust and bake for about 50-55 minutes.
- Let the cheesecake cool before refrigerating for at least 4 hours.
- Garnish with whipped cream and additional chopped Butterfinger before serving.
Notes
For best results, use room temperature ingredients and chill the cheesecake overnight for the perfect texture.
Nutrition
- Serving Size: 1 slice
- Calories: 540 kcal
- Sugar: 36g
- Sodium: 380mg

Leave a Reply